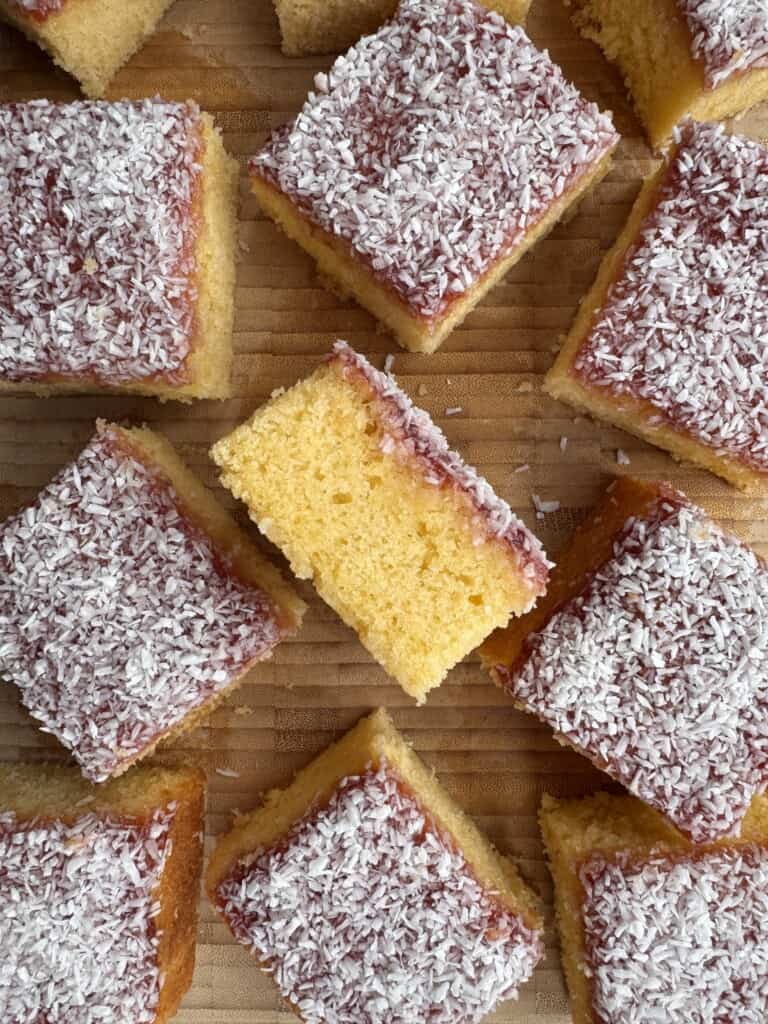
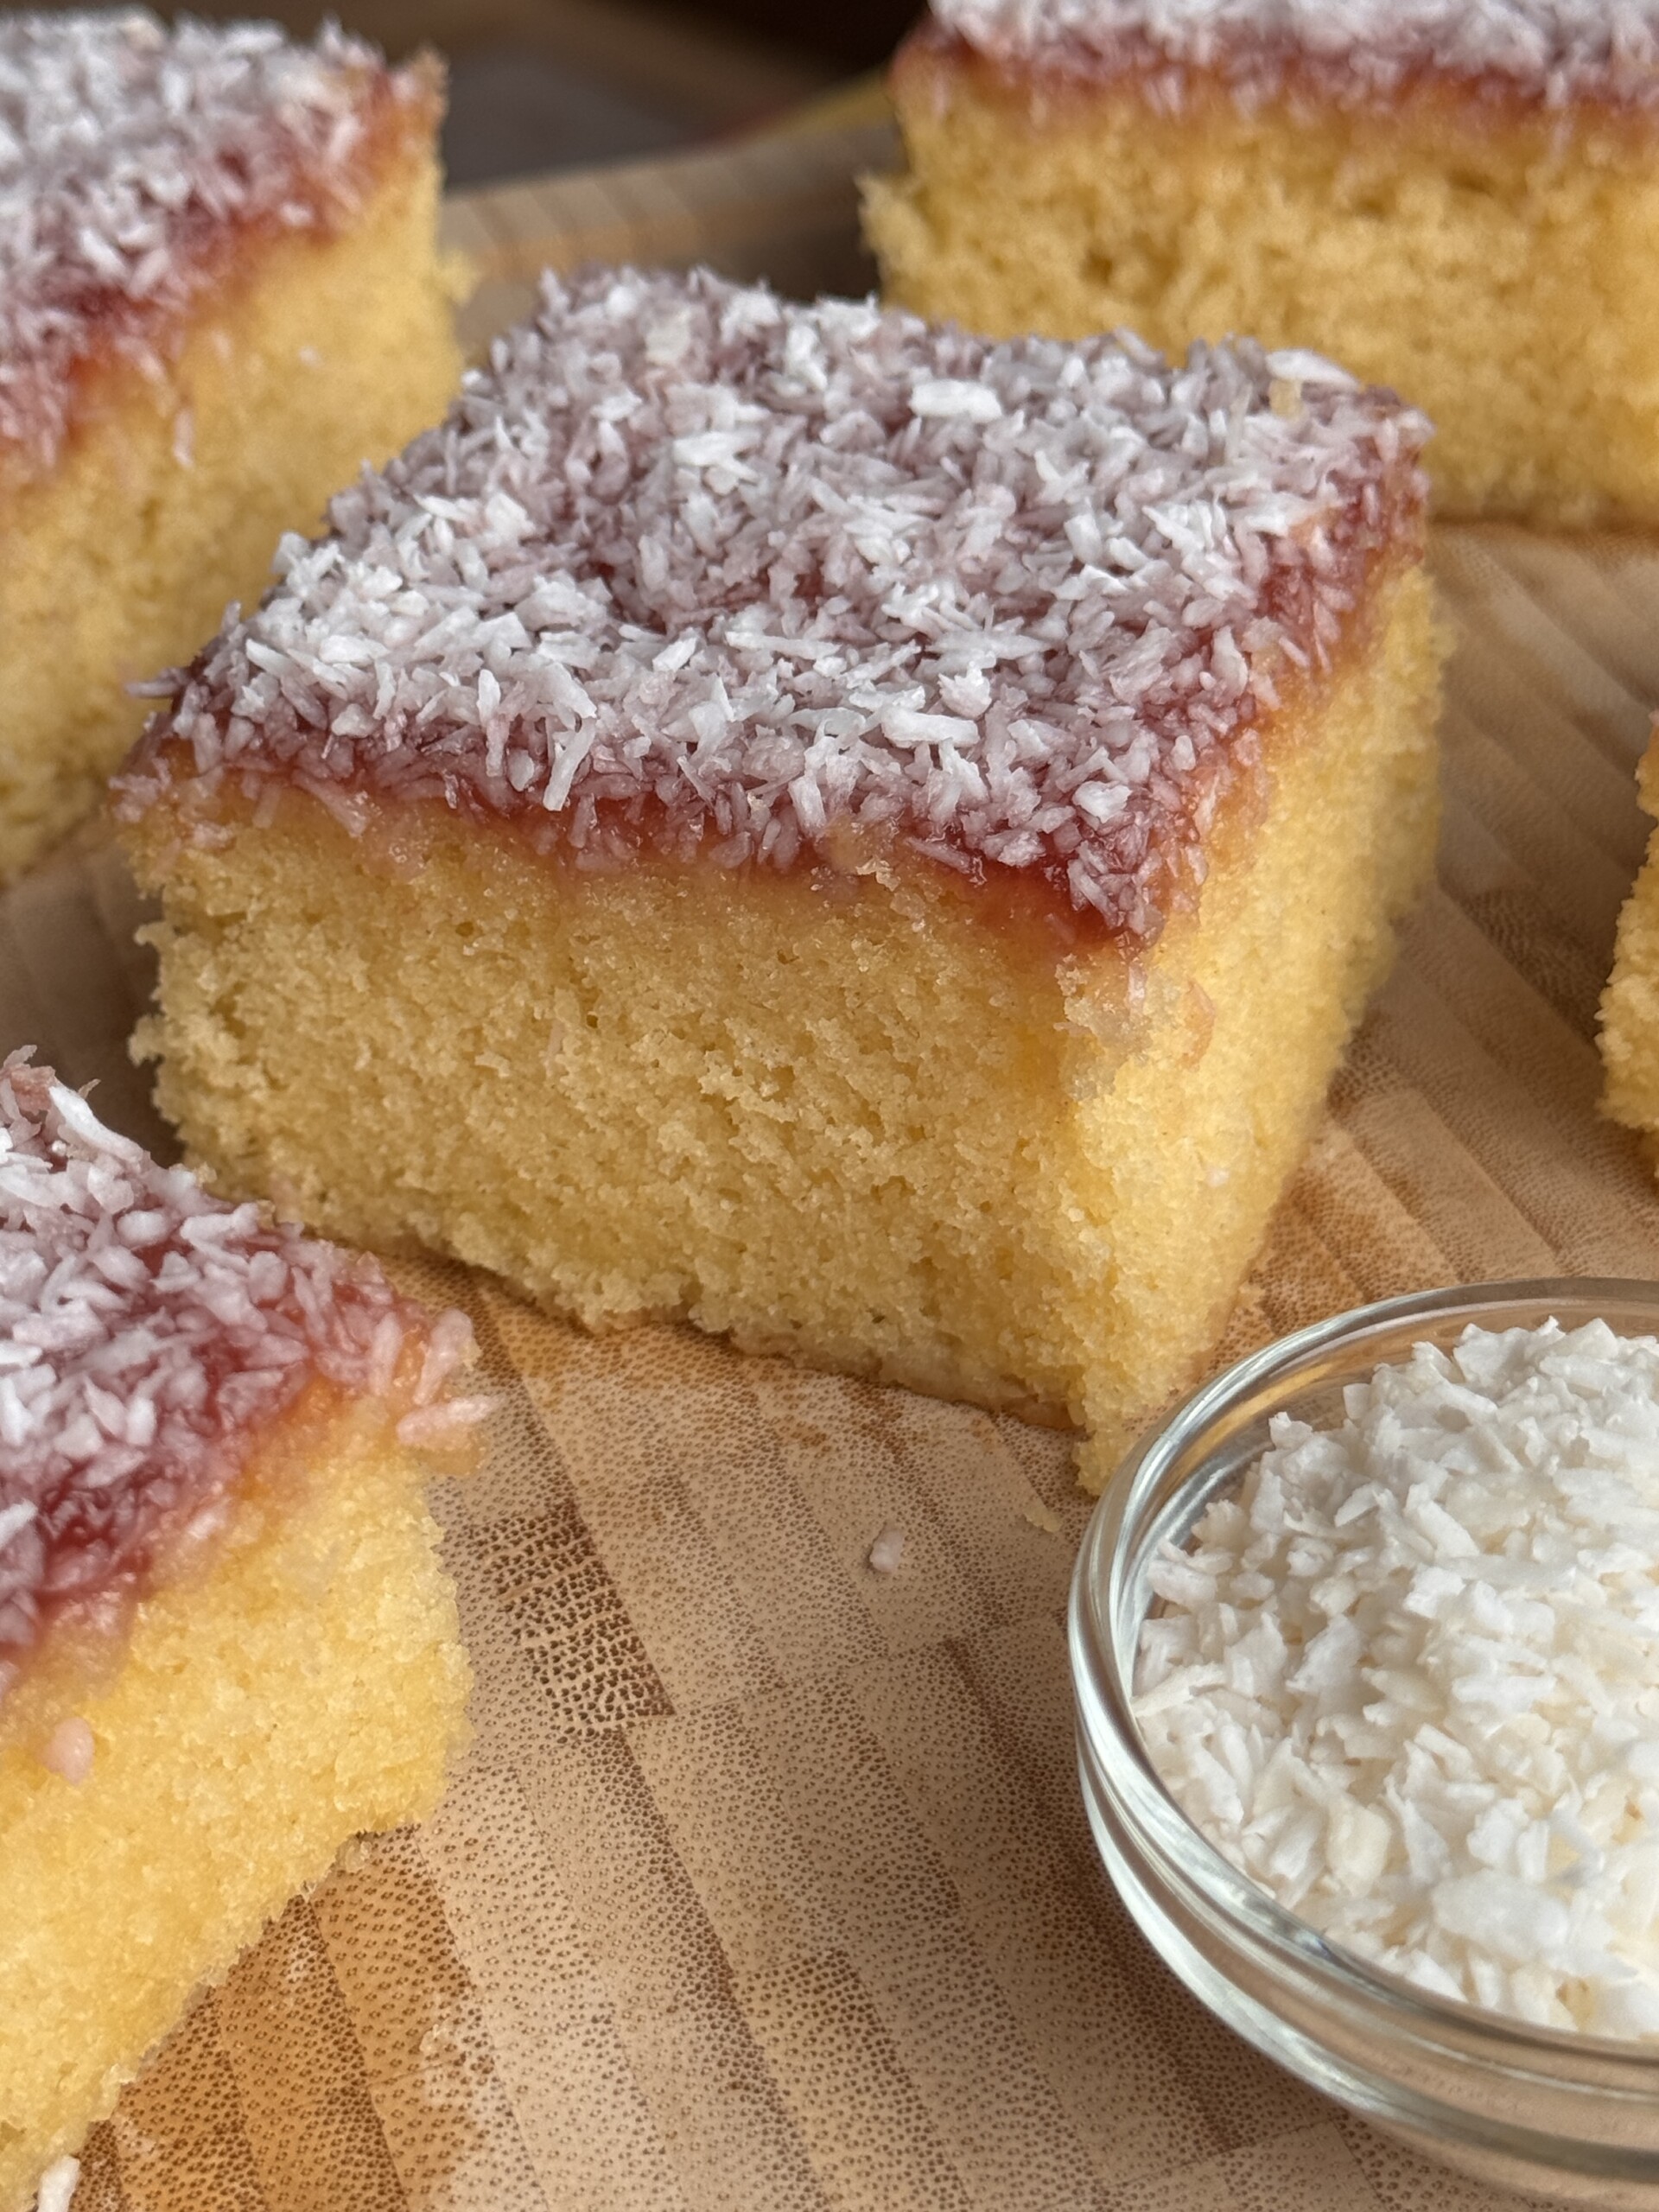
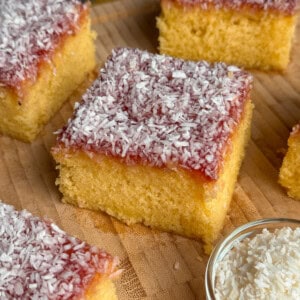
Jam and Coconut Sponge is my favourite classic UK and Scottish dessert often served as a dessert with school dinners. My version keeps things traditional, with a soft, fluffy sponge topped with raspberry jam and desiccated coconut.

Much like primary school cake, this coconut and jam sponge brings back nostalgic memories, but thankfully, you don't need to head back to the classroom to enjoy it. It's simple, comforting, and one of those bakes that always goes down a treat at birthdays, holidays, or a cosy afternoon tea.
Jump to:
It's one of my favourite things to order when I'm out at a café, alongside Empire Biscuits, of course. There's something about the simplicity of a jam and coconut sponge that makes it completely irresistible and perfect any time of the day.
What is Jam and Coconut Sponge?
If you’re not familiar, jam and coconut sponge is a classic British traybake served in school canteens across the UK, usually paired with warm custard for the ultimate comfort pudding. I always loved it alongside a hearty Chicken and Ham Pie. At its heart, it’s a light, fluffy sponge baked in a rectangular tin.
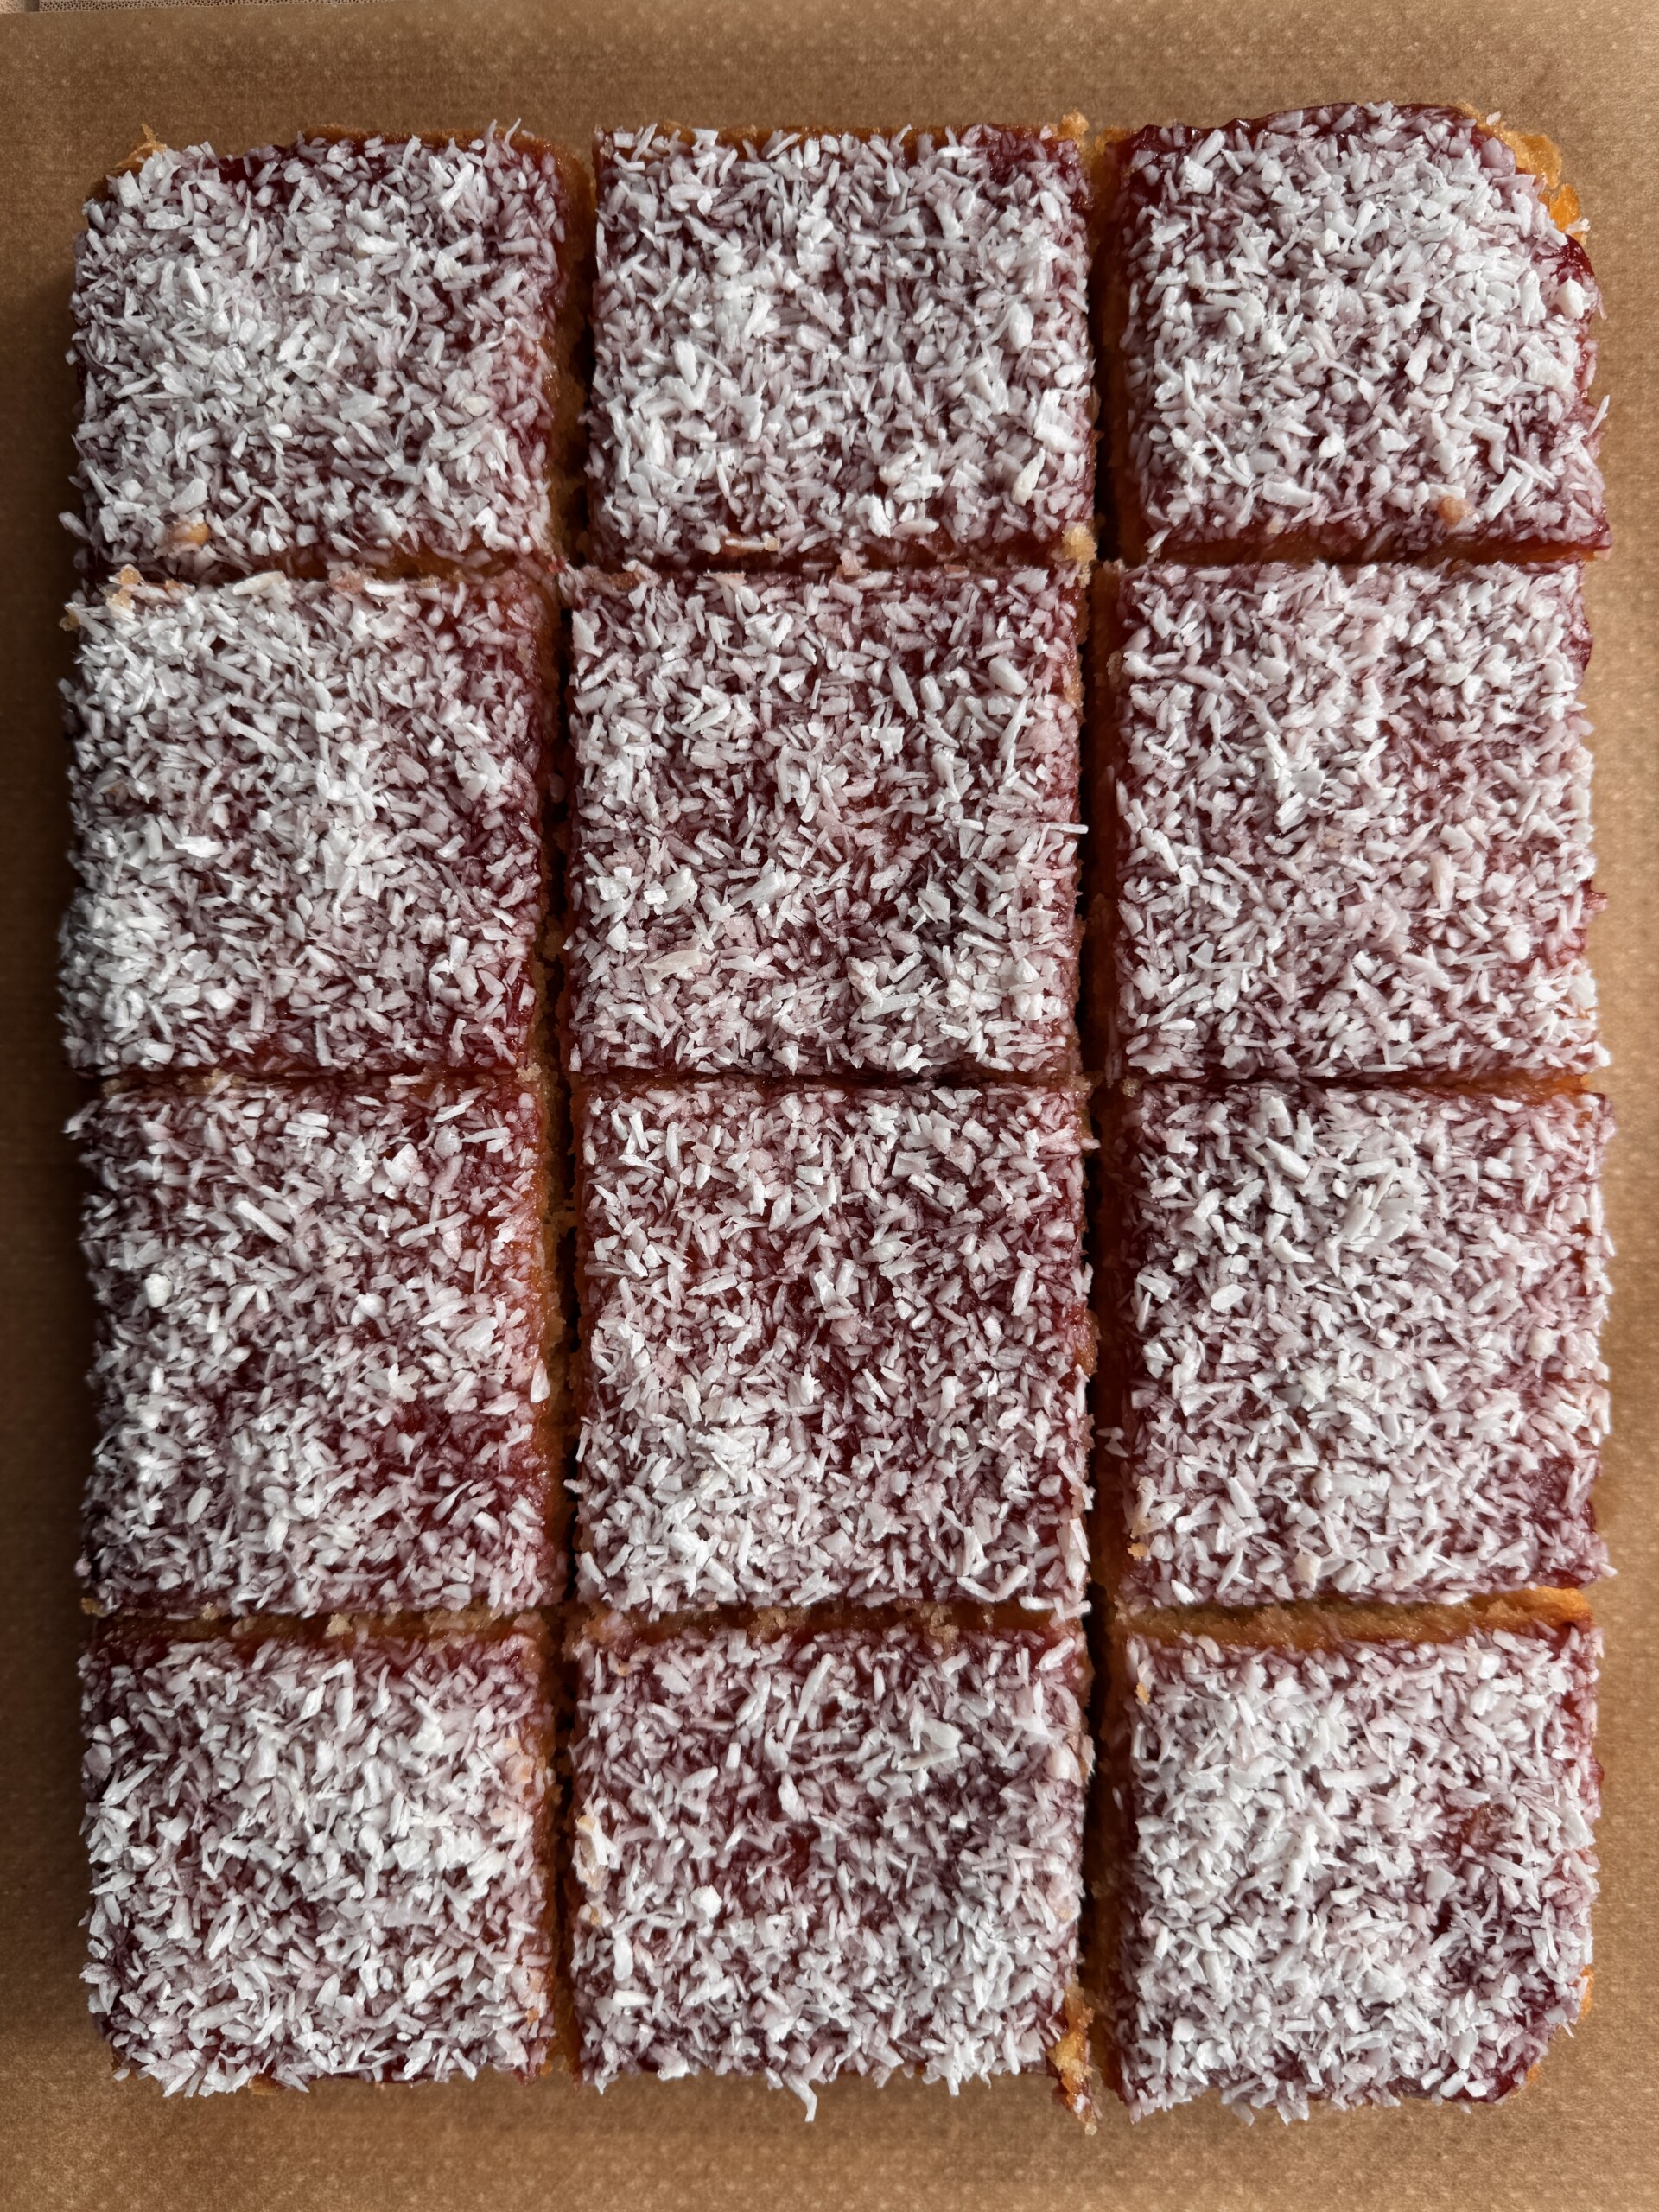
Once cooled, the sponge is topped with a generous layer of fruity jam and finished with a sprinkling of desiccated coconut. The combination of soft, buttery sponge with the sweet, slightly sticky jam and delicate coconut is absolutely spot on.
It’s typically cut into large squares, perfect for sharing, popping into lunchboxes, feeding a crowd, or serving warm with a drizzle of custard for a proper tea-time treat.
Ingredients You’ll Need
Please be sure to scroll down to the recipe card for the complete ingredient list and details.
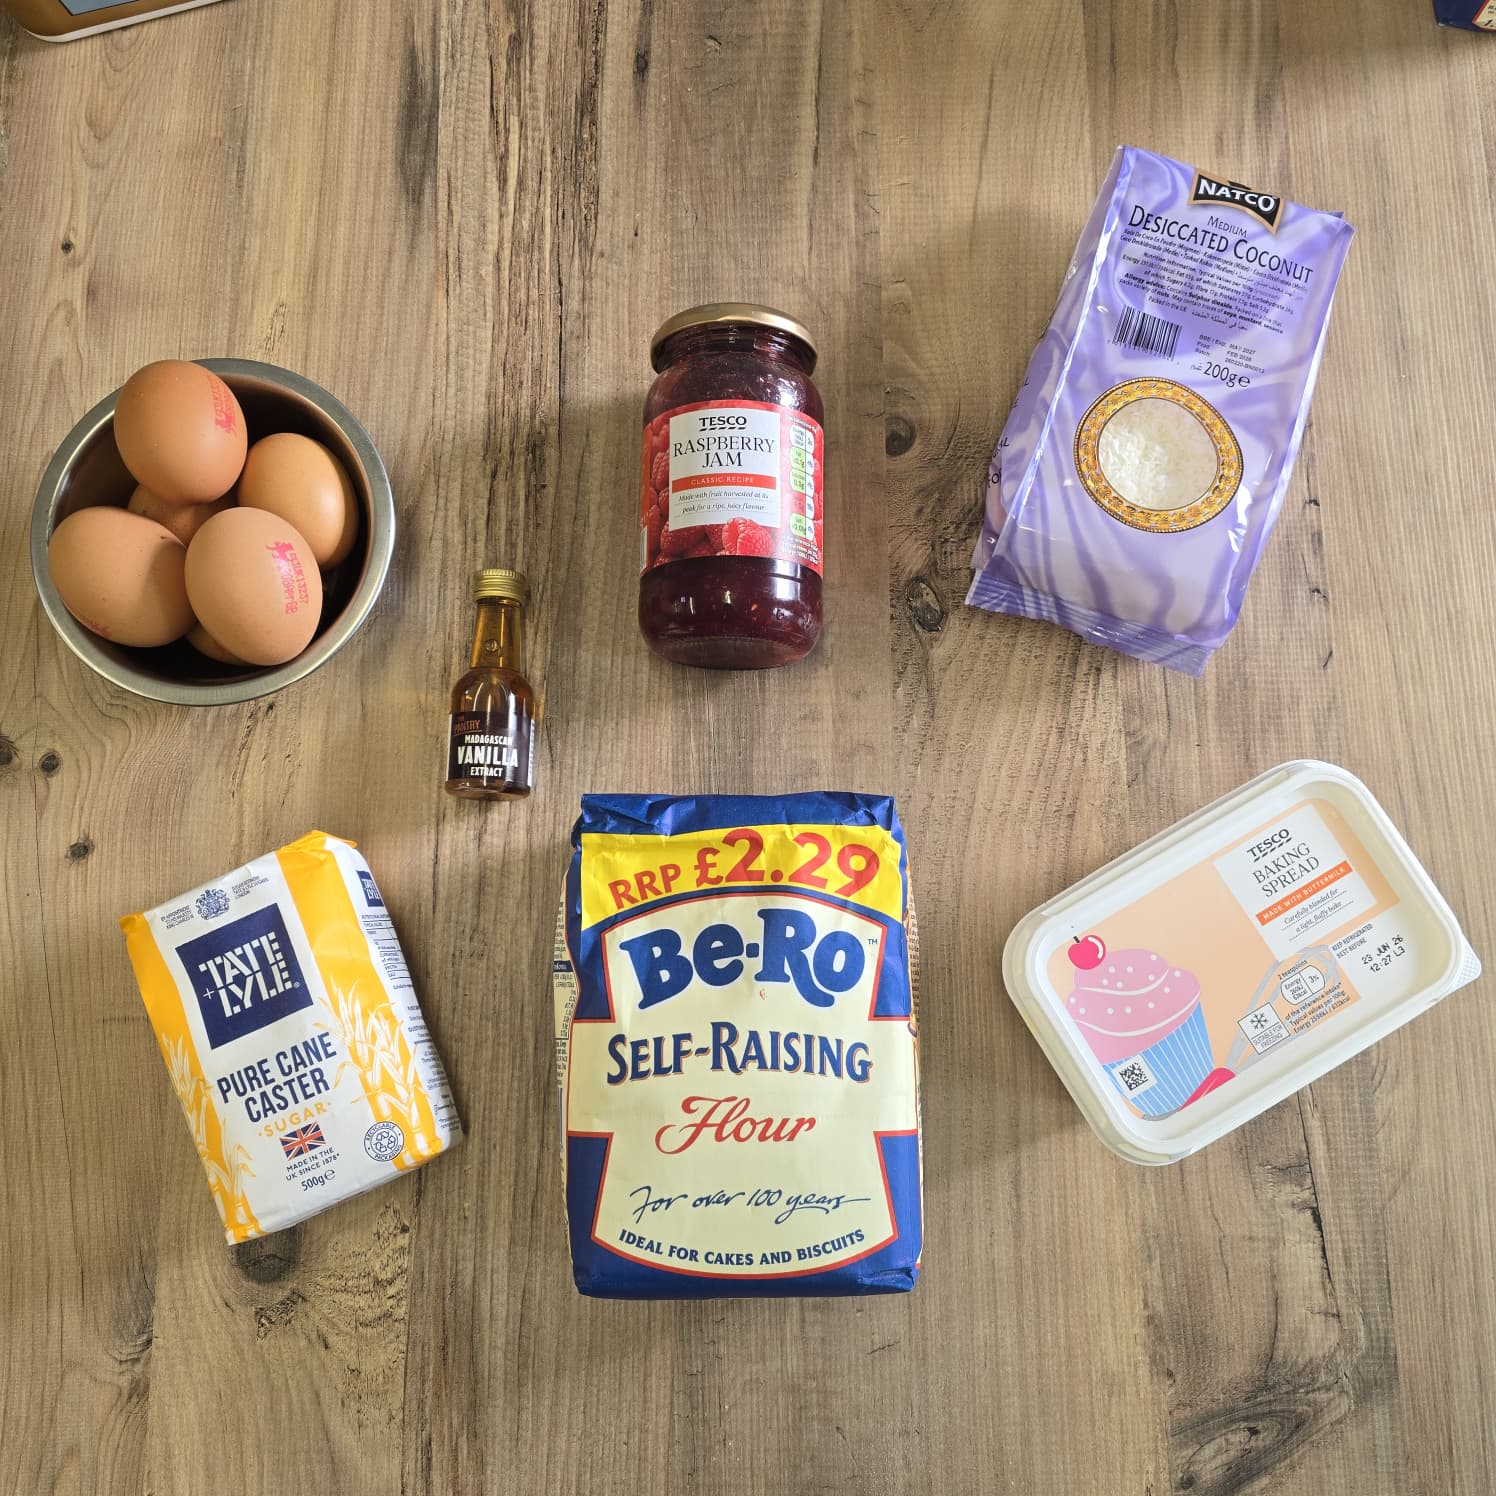
- Eggs: Medium or large eggs form the base of the sponge, giving it structure and that lovely light texture. Weighing them in their shells helps keep everything nicely balanced.
- Margarine: This is my go-to for all sponge cakes, and it's actually the most authentic choice here, too. Every school dinner lady worth her salt would have been reaching for a block of Stork, not butter! Baking margarine creams more easily with sugar and has a higher water content, which produces a lighter, fluffier texture, a better rise, and more moisture than butter. While butter wins on flavour in most bakes, for sponge cakes (even my Fruit Loaf recipe), margarine really is the superior choice.
- Self-Raising Flour: Self-raising flour gives the sponge its lift and soft texture, as the leavening agents are already built in. Save leftover flour to make Scottish Potato Scones, too. If you only have plain (all-purpose) flour, see my note in the tips section below on how to adapt the recipe so the sponge rises properly.
- Caster Sugar: This mixes easily into the margarine, creating a light and airy base for the sponge.
- Vanilla Extract: Just a splash adds warmth and enhances the flavour of the sponge without overpowering the cake.
- Raspberry Jam: The traditional choice for that classic Jam and Coconut Sponge flavour, adding a sweet but slightly tart layer. You can swap strawberry jam if you prefer and opt for seedless if it is your preference too.
- Desiccated Coconut: Sprinkled over the top, desiccated coconut adds a gentle texture and sweetness that pairs perfectly with the jam and sponge.
How to Make Jam and Coconut Sponge
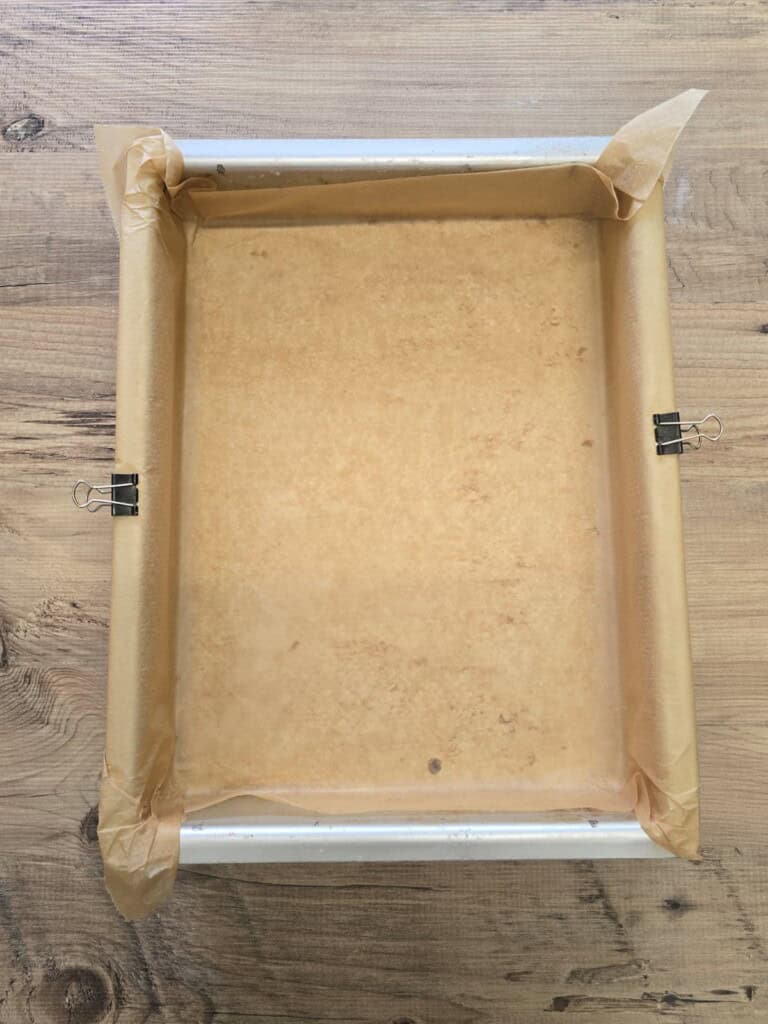
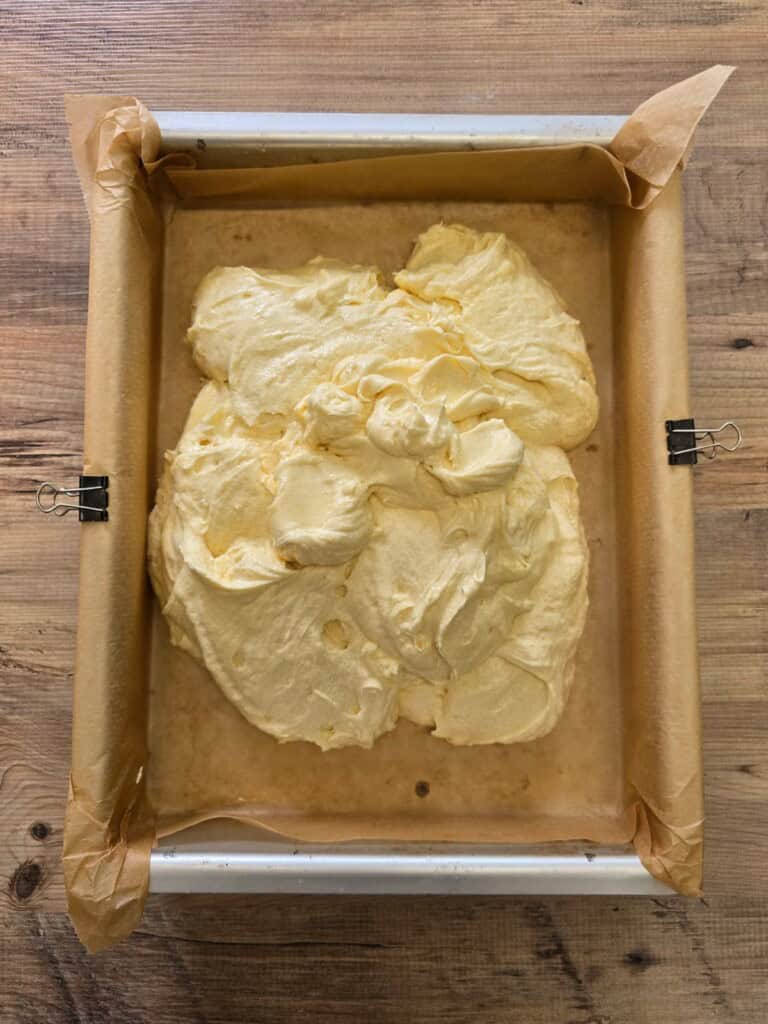
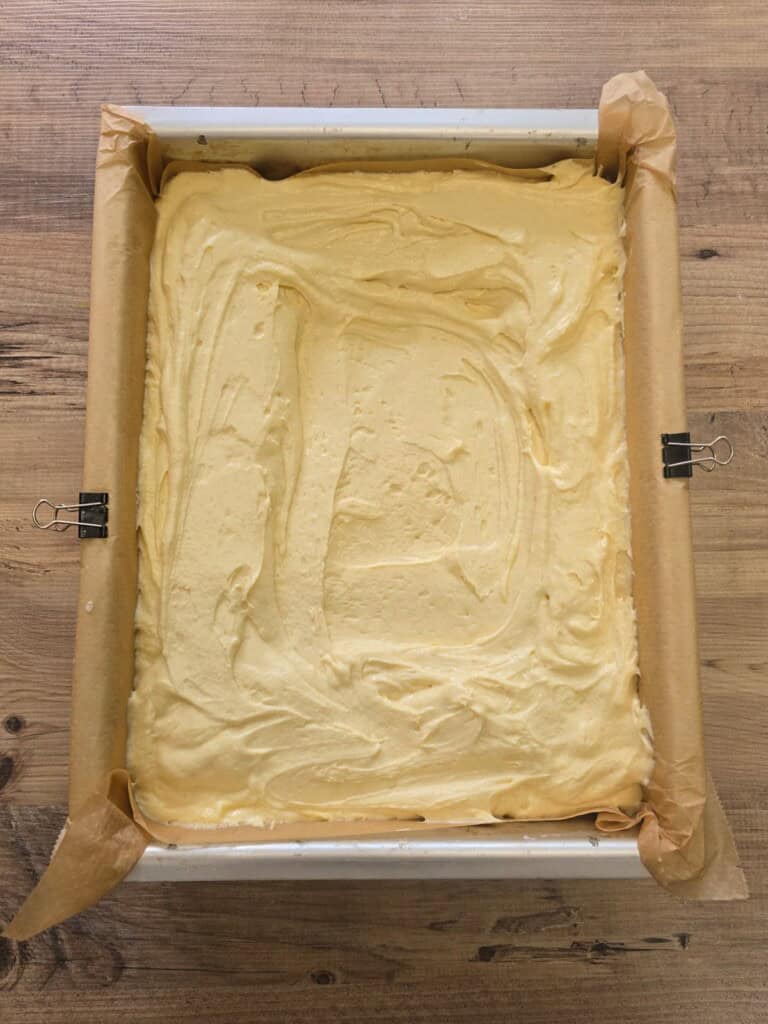
Before you begin, make sure to preheat your oven and line a cake tin with baking paper. I like to create a sling, letting the paper hang over the sides of the tin, which makes it easy to remove the cake after baking.
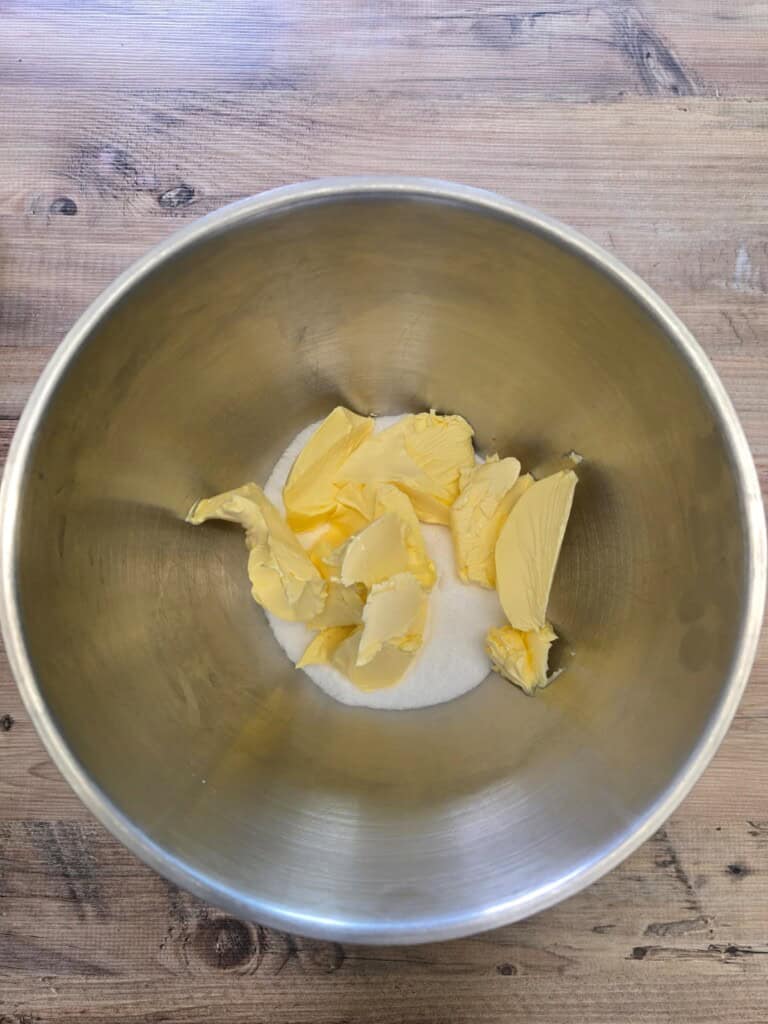
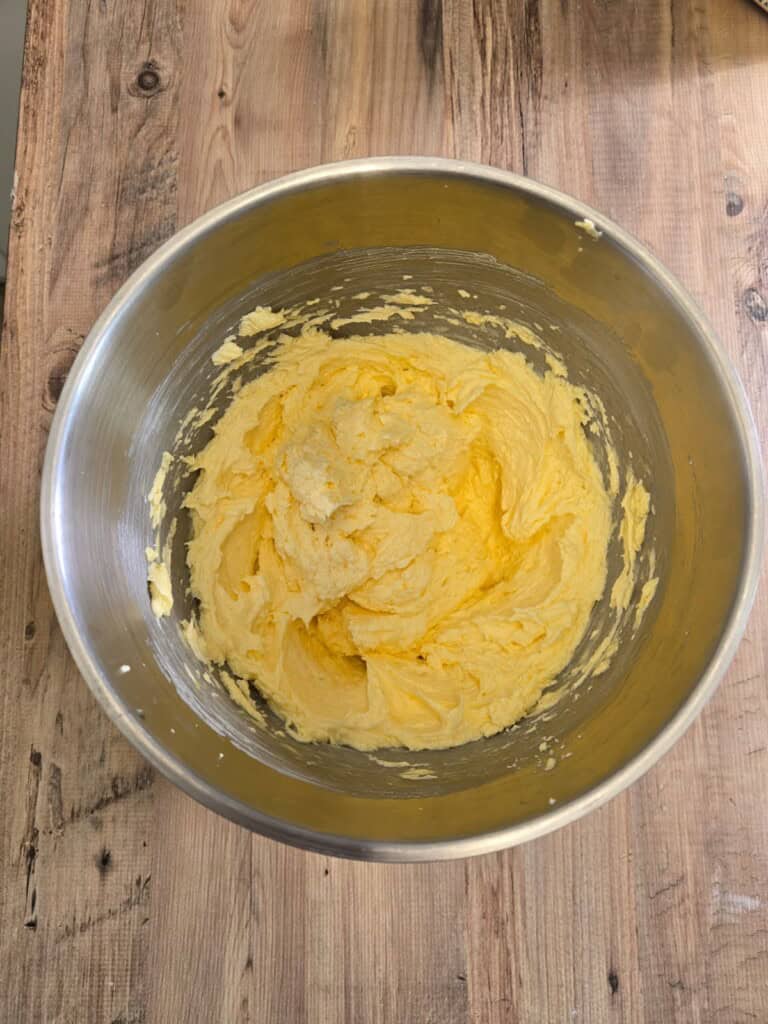
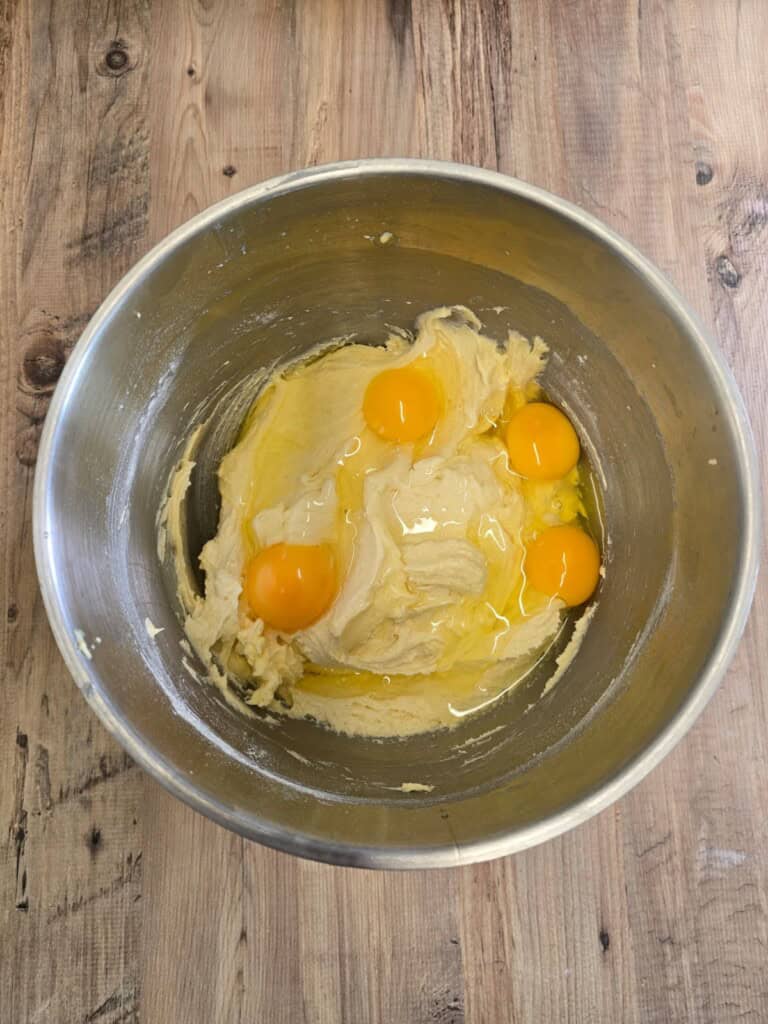
Combine wet ingredients. Cream the margarine and caster sugar together until pale and fluffy. I use a stand mixer with the balloon whisk attachment. This is genuinely the best method for achieving a consistently light and airy sponge, as it incorporates the most air. A hand mixer works well too, or you can use a wooden spoon with a bit of elbow grease. Be sure to scrape down the sides of the bowl as you go. Once combined, add half the eggs and mix again.

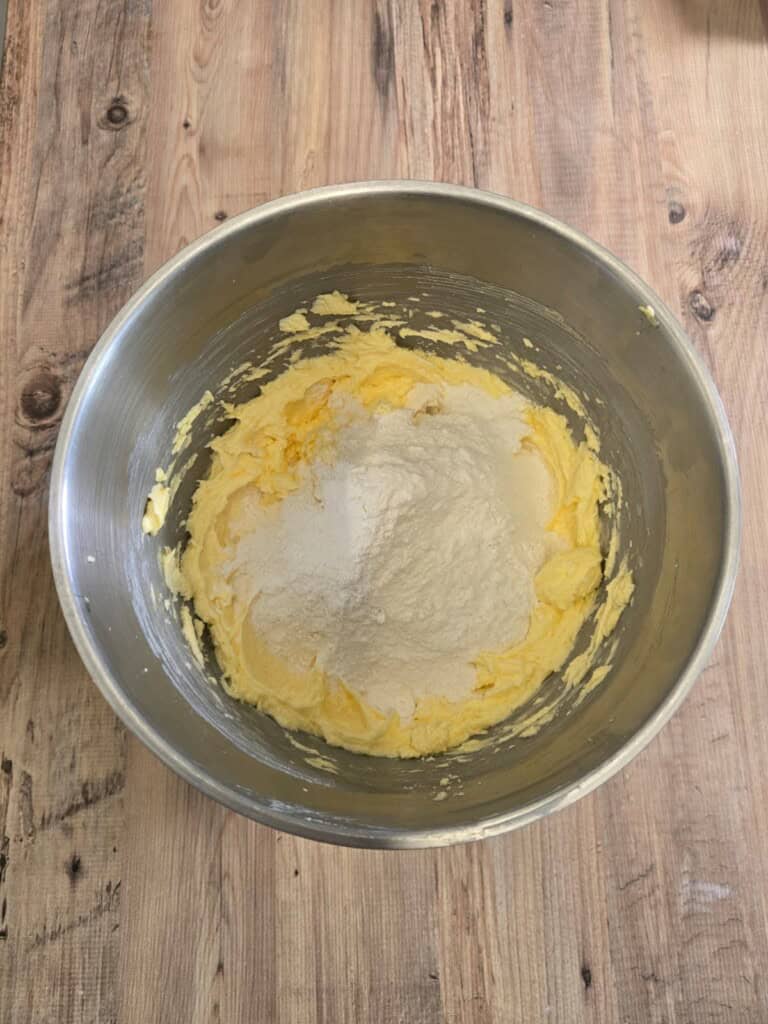
Add dry ingredients. Mix in half the flour, then add the remaining eggs along with the vanilla. Once combined, mix in the rest of the flour until you have a smooth, even batter.

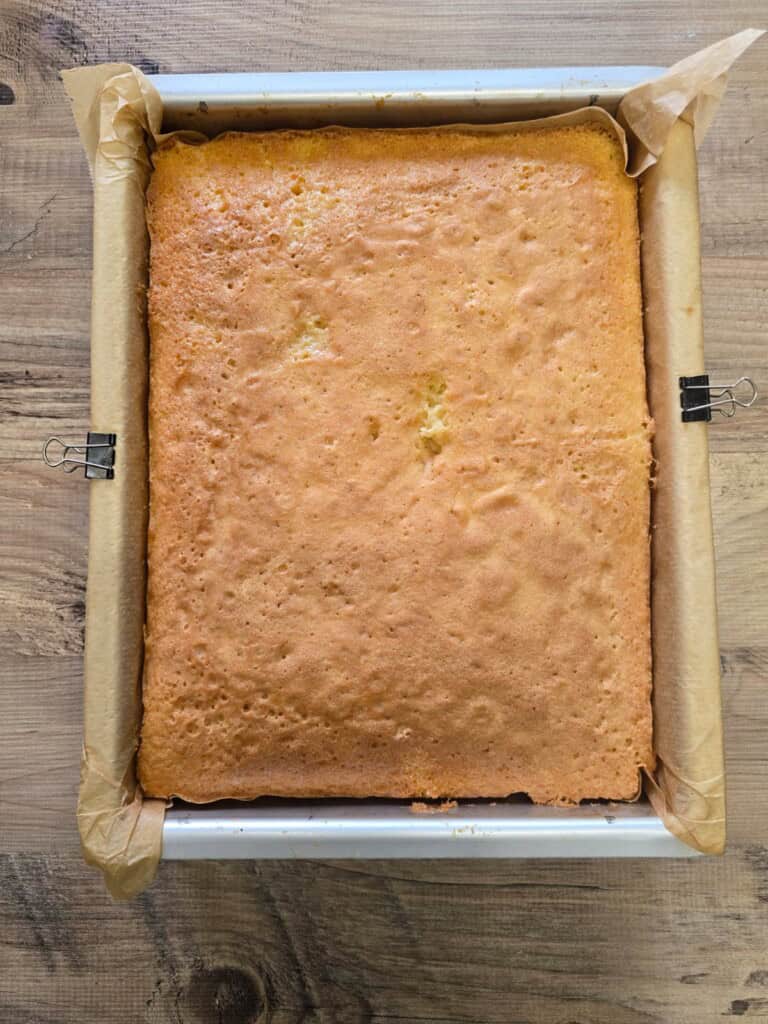
Bake. Transfer the mixture to your prepared tin, spreading it evenly and pushing it slightly away from the centre. This helps prevent a domed middle and gives you a more even sponge. To check it's done, insert a skewer into the centre. It should come out clean. Or, lightly press the middle of the sponge; it should spring back immediately with no wobble at all. Set aside to cool completely.
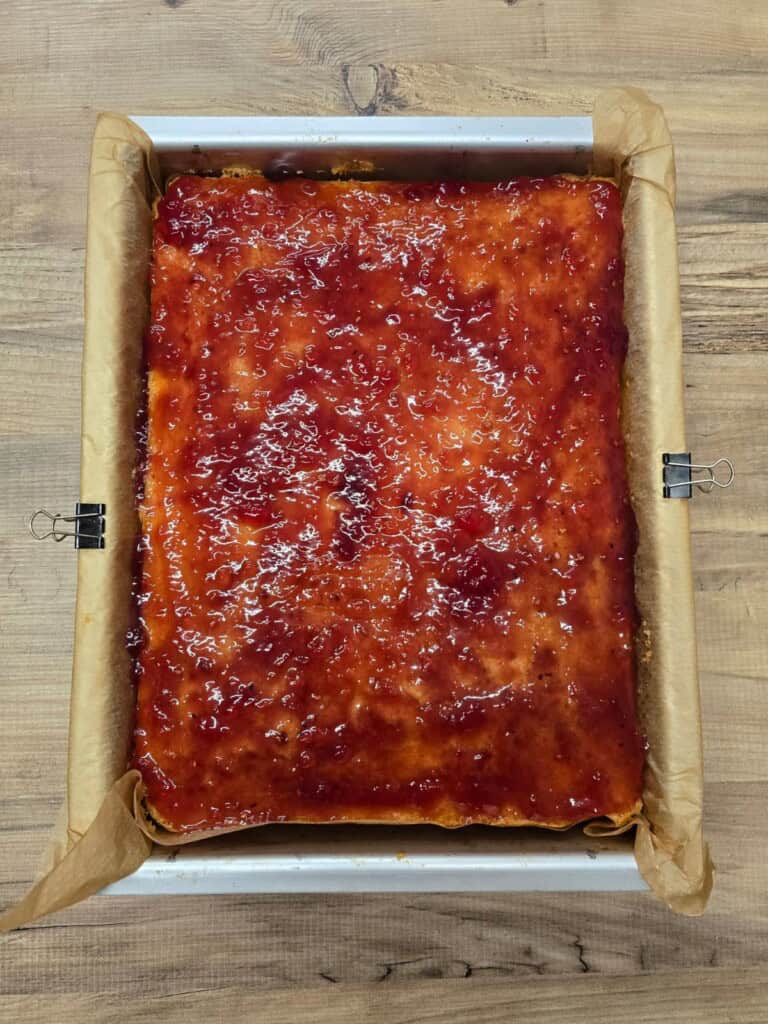
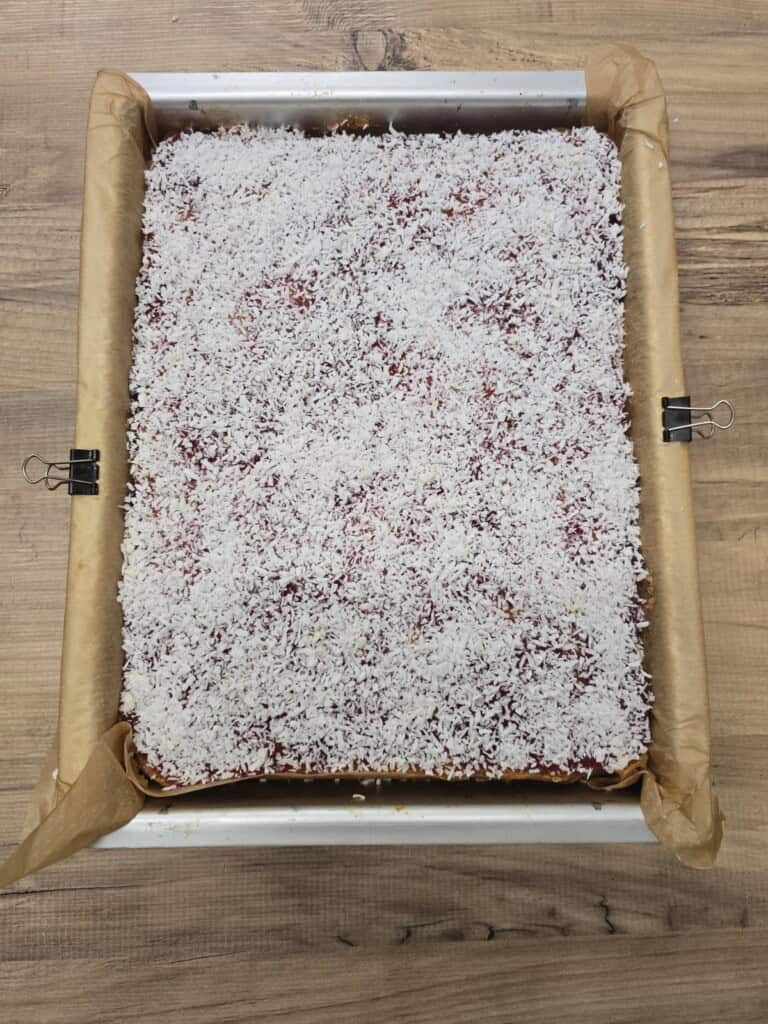
Layer and serve. Stir the jam to loosen it slightly, then spread it over the cooled sponge. Finish with a generous sprinkle of desiccated coconut, slice into squares, and enjoy.
My Top Tips & Tricks
- Understand the 1:1:1:1 ratio. A classic sponge is built on equal weights of eggs, fat, sugar, and flour. The easiest way to implement this is to weigh your eggs in their shells, then use that exact same weight for your margarine, caster sugar, and self-raising flour. For example, if your eggs weigh 200 grams, use 200 grams of each remaining ingredient. This ratio works across any sponge recipe, and it's the reason we always weigh the eggs rather than just counting them. A slight difference in egg weight can throw the whole balance off. If you adjust the quantity, bear in mind the bake time may need a few minutes' adjustment too.
- Use room temperature ingredients. Softened margarine and room temperature eggs will mix more smoothly, helping create a lighter, fluffier batter.
- Cream the margarine and sugar properly. Don’t rush this step! Mix until the margarine and sugar are pale and fluffy. This incorporates air into the batter, which gives the sponge its lift.
- Add ingredients gradually. Mixing in the eggs and flour in stages helps prevent the batter from curdling, keeping the texture smooth and even.
- No self-raising flour? No problem. Self-raising flour is a UK staple but isn't widely available elsewhere. To substitute plain (all-purpose) flour, add 2 teaspoons of baking powder per every 200 grams of flour (roughly ½ teaspoon per 50 grams of flour), and a small pinch of salt. Sift the baking powder and flour together thoroughly before using. The result will be very close to using self-rising flour.
- Cool completely before adding jam. If the sponge is even slightly warm, the jam can melt and become too runny. Let it cool fully for the best texture and clean slices of Jam Coconut Sponge.
Make Ahead (Prep) & Storage
This is jam and coconut sponge recipe is great to make ahead of time. You can bake the sponge in advance, then refrigerate it (well wrapped) for up to 7 days or freeze it for up to 3 months. Thaw at room temperature. Then, top the sponge with jam and coconut when you're ready to serve.
It's worth making a double batch so you have a plain sponge in the freezer to pull out whenever the craving strikes. It works just as well for this school cake as it does for any other jam and cream traybake.
At room temperature: Store leftover jam and coconut sponge in an airtight container for 3-5 days. If your kitchen is warm, keep it in the fridge, though this can firm the sponge slightly. Just let it come back to room temperature before serving.
To freeze: Wrap individual slices tightly in cling film, then a layer of foil, and freeze for up to 2-3 months. Defrost at room temperature when ready to enjoy.
FAQs
The key is to let the sponge cool completely before adding the jam. If the cake is even slightly warm, the heat will loosen the jam and cause it to soak into the sponge. You can also give the jam a quick stir to thicken it slightly before spreading, and apply it gently in an even layer rather than pressing it into the cake.
Yes. Raspberry jam is the traditional choice for that classic jam and coconut “school cake” sponge flavour, but strawberry, apricot, or even blackcurrant all work well. Just keep in mind that sweeter jams will give a milder flavour, while tangier options (like raspberry or blackcurrant) add a nice contrast to the sweet sponge.
For this recipe, I recommend margarine (like Stork or Flora). It creams more easily with sugar and produces a lighter, fluffier texture with a better rise compared to butter. It's also the most authentic choice. That said, if you'd prefer to use butter, it will still work and give a slightly richer flavour and denser texture. Just make sure it's well softened before you begin.
Other Dessert Recipes You Might Like
If you liked this Jam and Coconut Sponge recipe, you might like some of my other popular dessert recipes:

If you have any questions please leave a comment and I'll get back to you. Or I would really appreciate it if you left me a review below.
CRAVING MORE? Subscribe to my newsletter and follow along on Instagram, Tik Tok and YouTube for the latest updates.
Classic Jam and Coconut Sponge Recipe
Equipment
- 1 9" x 12" x 2" baking tin
- 1 Stand mixer and bowl with balloon whisk attachment (or you can also use a handheld electric whisk or wooden spoon)
Ingredients
- 400 g eggs (weigh in shells) should be around 6 medium eggs - See Notes for 1:1:1:1 ratio method
- 400 g baking spread or butter - See Notes
- 400 g self raising flour if substituting for plain (all-purpose) flour - See Notes
- 400 g caster sugar
- 1 teaspoon vanilla extract
- 200 g raspberry jam
- 50 g dessicated coconut
Instructions
- Preheat your oven to 180C (fan), 200C, 400F or Gas Mark 6
- Line a 9" x 12" (2" height) baking tin with baking paper and create a sling i.e. lett the paper hang over the sides of the tin, which makes it easy to remove the cake from the tin after baking
- Weigh out your 400 g eggs (weigh in shells) if they are slightly over or under don't worry, just as close to 400g as possible - See Notes
- Add your 400 g baking spread and 400 g caster sugar to a bowl and mix until it has gone a pale colour, around 2 minutes, scrape down the sides and bottom of the bowl to ensure and even mix
- Add in half the eggs to the butter and sugar and mix to combine, again scraping the side and bottom
- Add half of the 400 g self raising flour and mix to combine, again scraping the bottom and sides of the bowl
- Add in the remaining eggs and 1 teaspoon vanilla extract and mix to combine
- Add in the remaining flour and mix to combine (2-3 minutes mixing on a high speed), scrap down sides and bottom of the bowl half way through, the cake mixture, should be light in colour
- Place the sponge mix into the lined baking tray and spread out evenly
- Push the sponge mix away from the centre of the baking tin to each side of the tin, this will help to create a flatter sponge
- Place in your preheated oven and bake for 45-50 minutes until when inserting a tooth pick this comes out dry
- Allow the sponge to fully cool
- Measure out 200 g raspberry jam and mix it in the bowl to break it up into a smoother consistency to allow for easier spreading (you can use more jam if you want to)
- Gently spread the jam onto the fully cooled sponge
- Sprinkle 50 g dessicated coconut over the jam
- Cut into 12, 3" x 3" squares and enjoy

Leave a Reply